In the ever-evolving web development landscape, real-time communication has become a pivotal force driving user engagement and interactivity in modern web applications. In my previous article (Introduction to Real-Time Communication in PHP Laravel), we embarked on a journey into real-time communication within PHP Laravel. We delved into the array of tools and technologies at our disposal, including WebSockets, Server-Sent Events, and Long Polling, each offering its unique approach to real-time interaction.
As you journey deeper into WebSockets, reflect on the foundations laid in the first article. As you explore, real-time communication opens a Pandora's box of possibilities, enabling users to seamlessly interact with one another and receive immediate updates, all without the need for tedious manual refreshes. The canvas on which you paint this dynamic landscape is PHP Laravel, a robust framework that equips developers with the tools to craft web applications that come alive with real-time magic.
Let's take a moment to recap the terrain covered in the first article. I discussed three key methodologies: Long Polling, Server-Sent Events, and the topic of the current expedition, WebSockets. Each approach carries its unique charm, catering to specific scenarios and application requirements.
Long Polling, the patient messenger, represents an asynchronous approach where the client continuously checks for updates. It's like a game of hide and seek, where the client seeks real-time updates, and the server obliges when the time is right. Although more efficient methods exist, they have their use cases, but they aren't suitable for every occasion, especially when real-time requirements are less demanding.
Server-Sent Events introduced you to the elegant simplicity of unidirectional data flow. The server serenades the client with continuous updates, making it ideal for scenarios where real-time data flows in one direction, such as news tickers or live scoreboards. It's a tranquil river of data that flows gracefully from server to client.
Now, as you shift your focus to the grand orchestrator of real-time communication, WebSockets, you'll venture into bidirectional, full-duplex communication. It's akin to an open line of communication where both client and server can freely exchange messages, creating a real-time symphony of interaction. WebSockets empower you to build applications like chat systems, collaborative tools, live streaming platforms, and real-time analytics dashboards, which transform ordinary web applications into dynamic, interactive experiences.
In the first article, I highlighted many real-world use cases for real-time communication, each showcasing how Laravel's capabilities can breathe life into different application scenarios, from chat applications that instantly deliver messages to collaborative tools enabling seamless teamwork, to notifications that keep users informed, and even to live-streaming experiences that engage users in real-time. Laravel's real-time features adapt to many use cases, leaving room for creativity and innovation.
As you step into this second article, you've already laid the foundation, and your understanding of real-time communication has deepened. With their bidirectional prowess, WebSockets will take center stage, and will unravel the intricacies of implementing them in Laravel. The canvas is set, the colors are ready, and the brush of WebSockets is poised for action. Let's dive deeper into the world of real-time communication and unleash the full potential of PHP Laravel in creating immersive, interactive web applications.
Today, I'll cover building real-time applications in Laravel with WebSockets in detail.
Setting Up a Laravel Application
Start by creating a new Laravel app. There are several methods for creating a new Laravel app. I chose the Docker-based one using the Laravel Sail package. You can read more about Laravel installation by following this URL: https://laravel.com/docs/10.x/installation.
Choose the method that best suits you. Before you start, make sure you have Docker running on your computer.
I'm using a MacBook Pro. I start by running this command:
curl -s \"https://laravel.build/laravel-websockets"\
| bash
This creates a new Laravel application on your computer under the directory named laravel-websockets.
Open the .env file and add the following environment variables:
APP_PORT=1012
FORWARD_DB_PORT=4008
FORWARD_MAILPIT_PORT=2012
FORWARD_MAILPIT_DASHBOARD_PORT=2013
FORWARD_MEILISEARCH_PORT=6012
FORWARD_REDIS_PORT=6013
VITE_PORT=1011
After the installer finishes, run the following commands.
Build up the Docker container.
./vendor/bin/sail up
Install the NPM packages.
./vendor/bin/sail npm install
Serve the application.
./vendor/bin/sail run dev
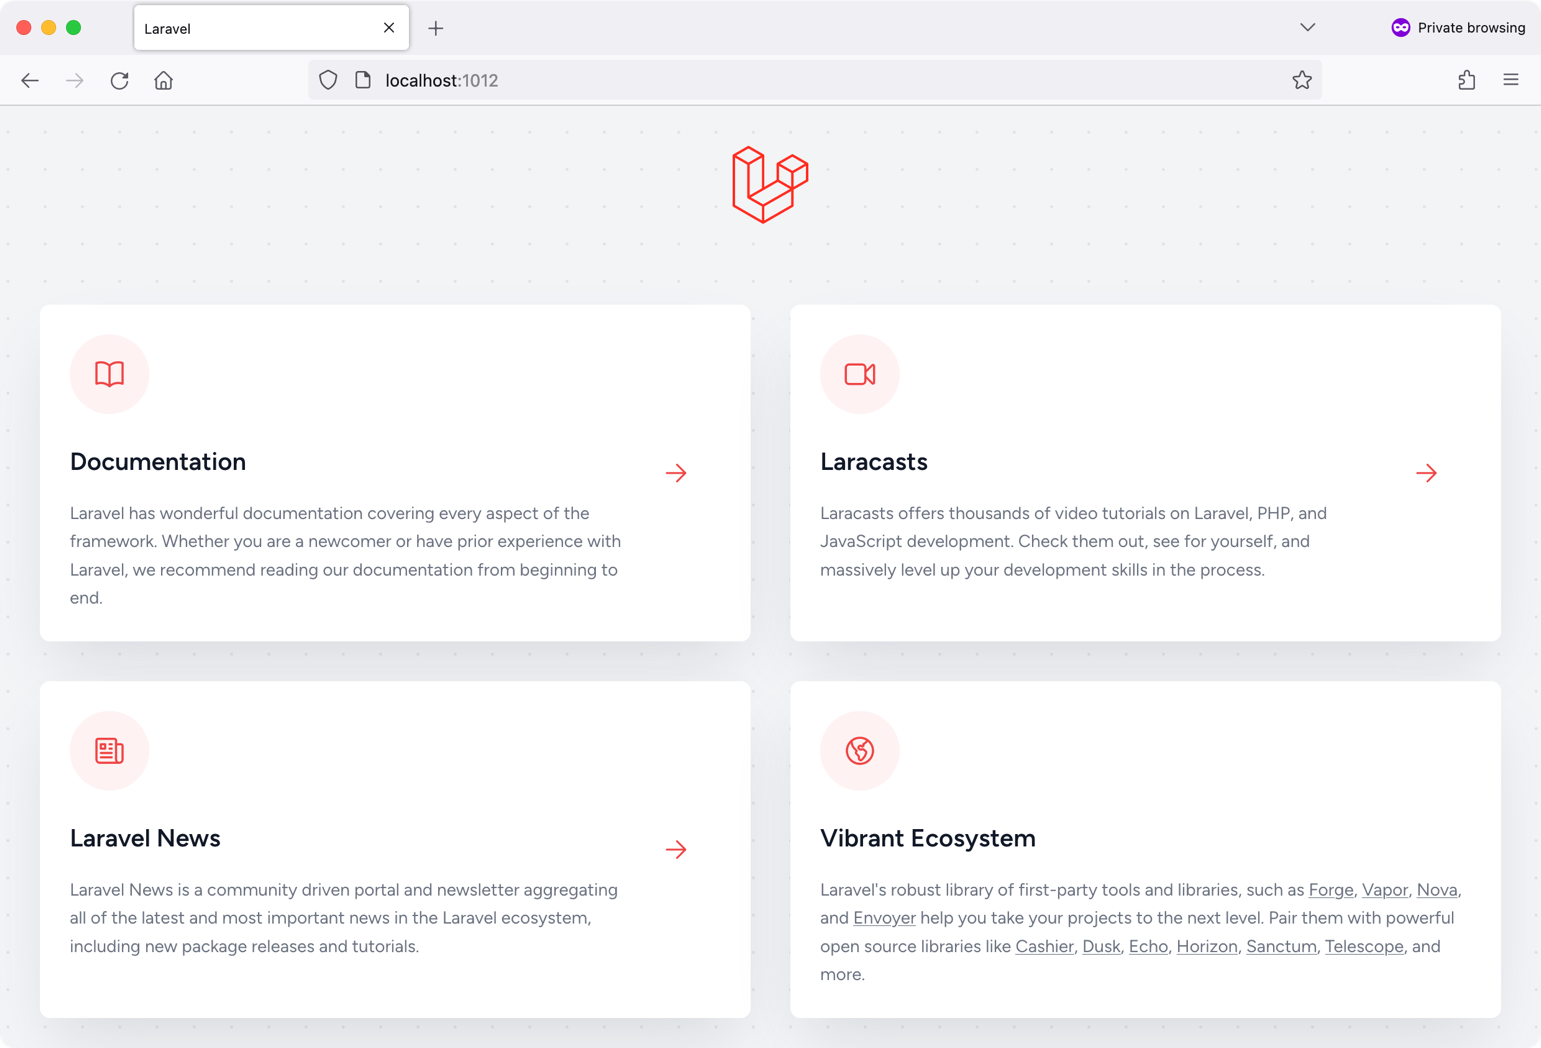
The application is now accessible at http://localhost:1012. Open the URL in the browser, and you'll see the same view as in Figure 1.
Next, let's install the Laravel Breeze starter kit. The Laravel team provides this starter kit for scaffolding Laravel authentication and profile management. This is my ultimate choice when starting a new Laravel project. Trust me. It saves you a lot of time! You can read more about Laravel Breeze here: https://laravel.com/docs/10.x/starter-kits#laravel-breeze.
Laravel Breeze Installation
Laravel Breeze comes in four flavors:
- Breeze & Blade
- Breeze & React
- Breeze & Vue
- Breeze & Next.js/API
I'll use Breeze & Vue for this article.
Run the following commands to install Laravel Breeze, VueJS, and InertiaJS together:
./vendor/bin/sail composer require | \laravel/breeze --dev
./vendor/bin/sail artisan breeze:install vue
./vendor/bin/sail artisan migrate
./vendor/bin/sail npm install
./vendor/bin/sail npm run dev
By installing Laravel Breeze, you've installed many new things in your application. Let me list them briefly, but you can always check this repository commit entitled install Laravel Breeze package to check every new file and configuration the package adds.
In addition to the Breeze Starter Kit, Laravel offers the JetStream Starter Kit, a more advanced option.
Laravel Breeze does the following:
- Adds Vue, InertiaJS, and Tailwindcss
- Configures InertiaJS
- Configures Tailwindcss
- Scaffolds a front-end application using Vue/InertiaJS
- Adds Laravel Authentication controllers, views, and routes
Now that you have your Laravel application up and running, let's start adding real-time communication.
Using WebSockets in Laravel
In this section, let's explore using WebSockets inside a Laravel application to provide real-time communication features.
To start using WebSockets in Laravel, you must have a WebSocket server up and running. There are many options. They range from free ones to paid ones.
In brief, the need for having WebSocket servers can be summarized as follows:
- WebSocket Protocol: WebSockets use a different protocol than regular HTTP requests. Although Laravel provides a robust HTTP routing system, it doesn't natively support the WebSocket protocol. Therefore, you need a specialized server that understands the WebSocket protocol to handle WebSocket connections.
- Handling Persistent Connections: WebSockets maintain a persistent connection between the client and the server, allowing for real-time communication. This is different from traditional HTTP requests, which are stateless and short-lived. To handle and manage these persistent connections, you need a server specifically designed to handle WebSocket connections.
- Real-Time Communication: WebSockets are ideal for applications that require real-time updates, such as chat applications, real-time collaboration tools, or live dashboards. With a WebSocket server, you can instantly push data from the server to the client without relying on periodic HTTP requests or polling techniques.
- Broadcasting Events: Laravel provides a powerful event broadcasting system, allowing you to broadcast events to the front-end and push them to subscribed clients. To use this feature, you need a WebSocket server that can listen to these events and broadcast them to the connected WebSocket clients.
In Laravel, you can integrate WebSockets using packages such as Laravel Echo, Pusher, Ably, or Laravel WebSockets. These packages provide the necessary tools and configurations to set up a WebSocket server and handle WebSocket connections within your Laravel application.
Pusher is by far the most popular WebSocket server in the Laravel community. It's essentially a subscription-based web service that provides you with a WebSocket server once you sign up with them.
For this article, I'll be using Pusher (https://pusher.com/). Register an account at their website. You'll use it later to configure your Pusher API application.
Install and Configure Server-Side Packages
Let's start by installing the pusher/pusher-php-server package. This package is the official PHP library provided by Pusher to interact with their service from a PHP-based application like Laravel. Follow these steps to install the pusher/pusher-php-server package.
Run this command:
sail composer require pusher/pusher-php-server
Or
composer require pusher/pusher-php-server
Next, you create an application on the https://www.pusher.com website, copy all the required configuration settings, and include them in your application. The process of creating a new app is straightforward.
I'm sharing my app's Pusher configuration with you, as shown in Figure 2.
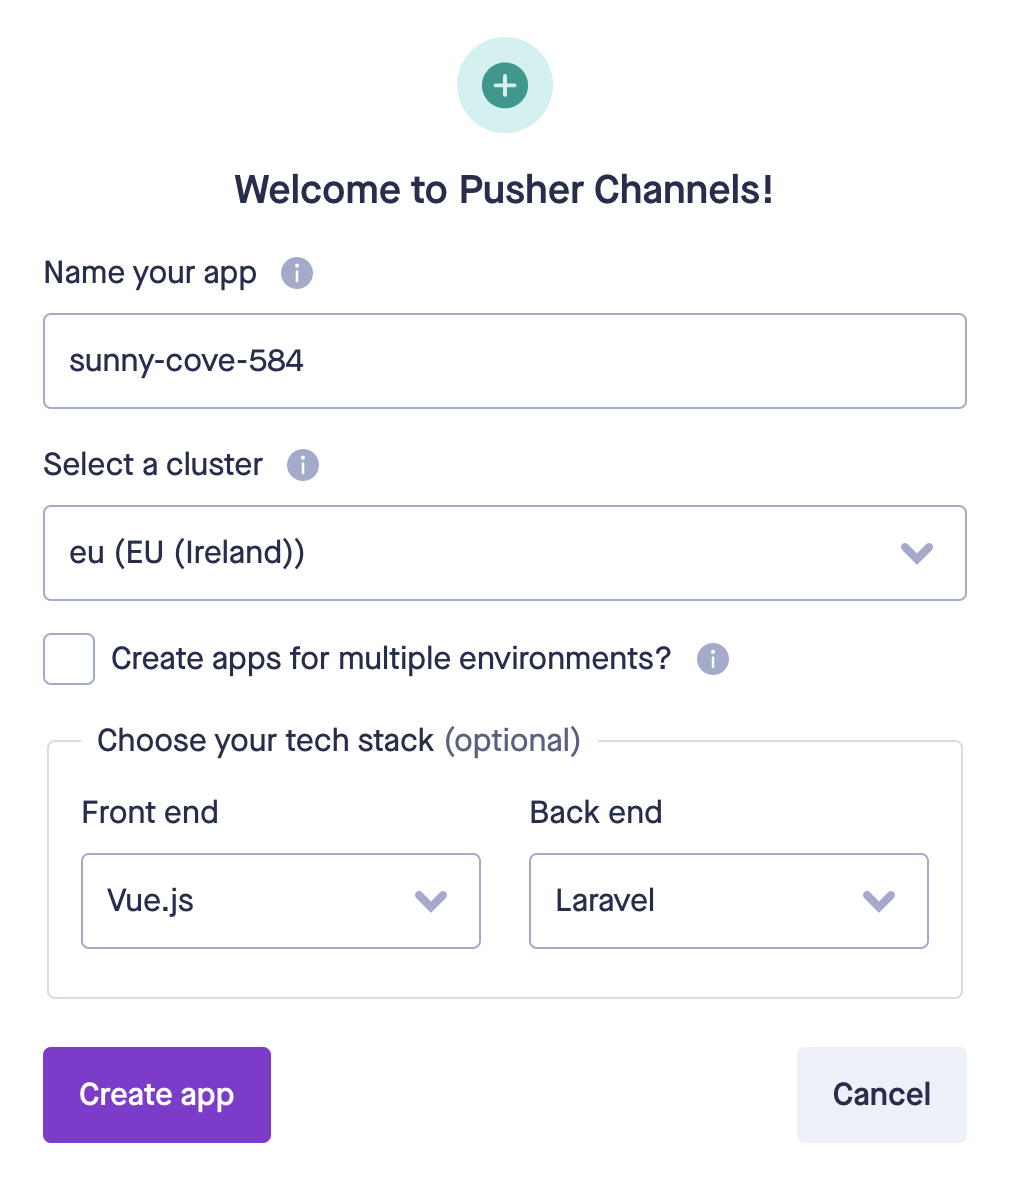
Follow the instructions on the page to configure the back-end of your application.
Then copy the environment variables and include them in the .env file.
PUSHER_APP_ID=
PUSHER_APP_KEY=
PUSHER_APP_SECRET=
PUSHER_APP_CLUSTER=
Inside the config/broadcasting.php file, include the following settings under the Pusher entry inside the Connections section.
'options' => [
   'cluster' => 'eu',
   'useTLS' =>  true
],
The Pusher entry looks like the one shown in Listing 1. Depending on your location, the cluster option might have a different value.
Listing 1: Pusher configuration section
'pusher' => [
   'driver' => 'pusher',
   'key' => env('PUSHER_APP_KEY'),
   'secret' => env('PUSHER_APP_SECRET'),
   'app_id' => env('PUSHER_APP_ID'),
   'options' => [
       'cluster' => 'eu',
       'useTLS' =>  true
    ],
    'client_options' => [],
],
Finally, ensure the BROADCAST_DRIVER environment variable inside the .env file has a value of pusher.
BROADCAST_DRIVER=pusher
Next, make sure to register the BroadcastServiceProvider class inside the config/app.php file. Without this service provider, the WebSockets feature won't work in Laravel.
'providers' => ServiceProvider::defaultProviders()
   ->merge([
         // ...
   App\Providers\BroadcastServiceProvider::class,
         // ...
])->toArray(),
That's it!
Let's test the connection with Pusher by broadcasting a sample event.
Start by creating a new Laravel Event by running this command:
sail artisan make:event \
   PusherStatusTest
Or
php artisan make:event \
   PusherStatusTest
Listing 2 shows the complete code for this event. Ignore the details of the event. I'll detail it very soon.
Listing 2: PusherStatusTest event class
<?php

namespace App\Events;

use Illuminate\Broadcasting\Channel;
use Illuminate\Broadcasting\InteractsWithSockets;
use Illuminate\Contracts\Broadcasting\ShouldBroadcast;
use Illuminate\Foundation\Events\Dispatchable;
use Illuminate\Queue\SerializesModels;

class PusherStatusTest implements ShouldBroadcast
{
   use Dispatchable;
   use InteractsWithSockets;
   use SerializesModels;

   public function broadcastOn(): array
   {
      return [
          new Channel('pusher-status'),
      ];
   }

   public function broadcastWith(): array
   {
      return [
          "Testing Pusher connection from inside Laravel"
      ];
   }
}
Just focus on the function named broadcastWith. In this function, you return the payload you want to be sent alongside the broadcast event.
Open a new Tinker session by running this command:
sail artisan tinker
Or
php artisan tinker
Then, run the following line of code to broadcast the event that you just created:
broadcast(new \App\Events\PusherStatusTest);
You could also use the event function. However, it's preferable to use the broadcast function when broadcasting events.
Head straight to the Pusher Debug Console; you should see a log for the event you just broadcast in Figure 3.
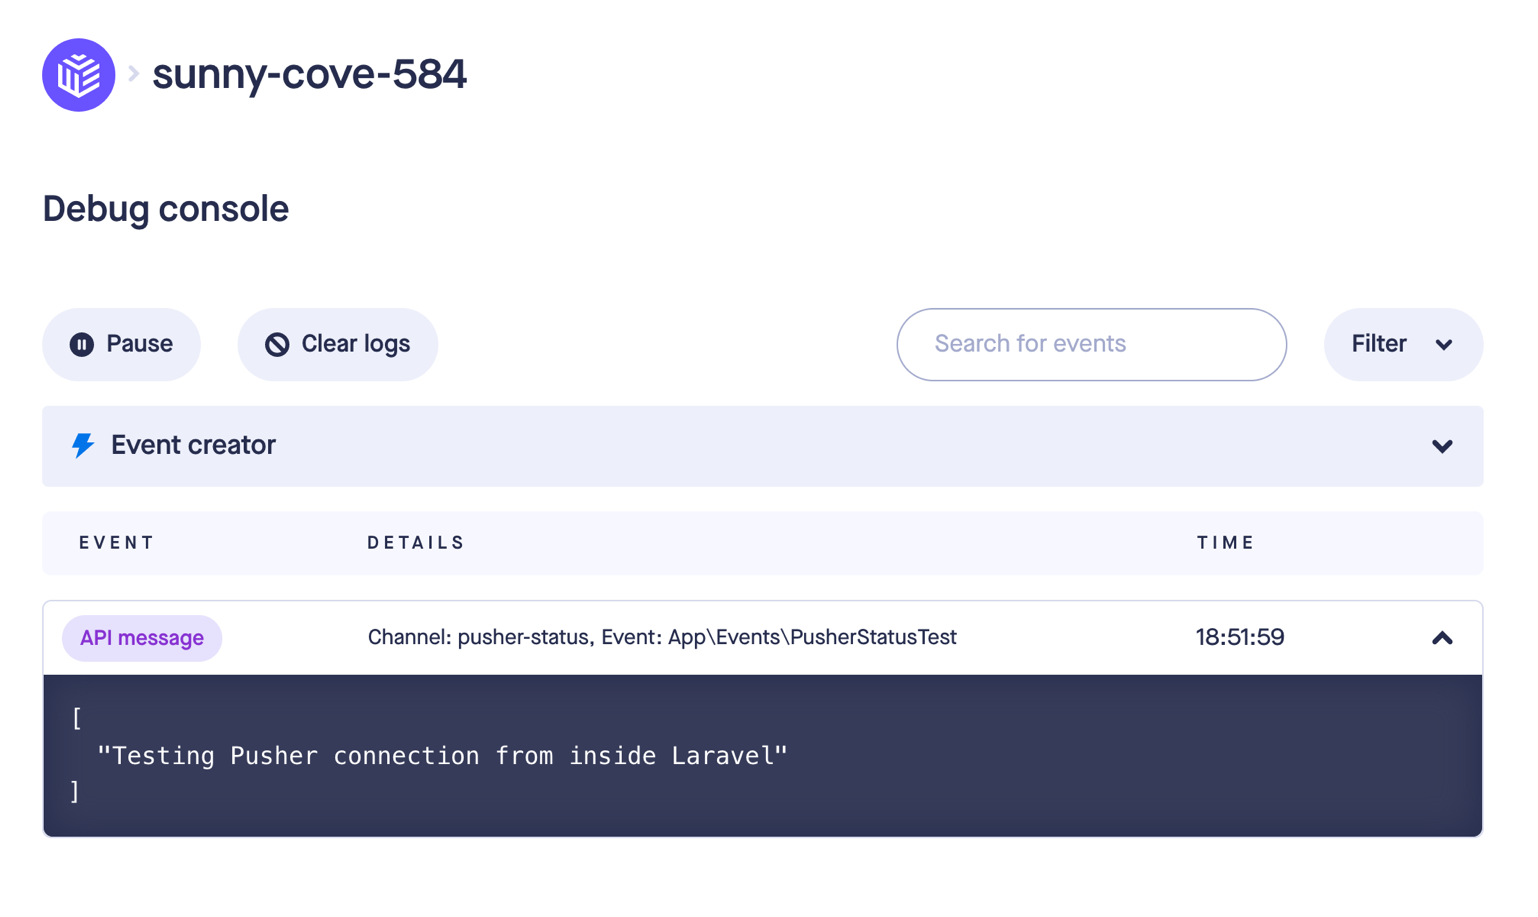
Success!
Let's switch to the front-end to install the required packages.
Install and Configure Front-End Packages
Let's start by installing the laravel-echo NPM package.
Laravel Echo is a JavaScript library provided by the Laravel framework for building real-time web applications. It acts as a client-side integration for Laravel's event broadcasting system, allowing developers to quickly implement real-time communication between the server and the client.
Run this command to get the library installed locally:
sail npm install laravel-echo
Or
npm install laravel-echo
The second package to install is the pusher/pusher-js NPM package.
The pusher-js NPM package is a JavaScript client library provided by Pusher, a company specializing in real-time messaging and communication APIs. The library allows developers to integrate real-time functionality into their web applications quickly.
Run this command to get the library installed locally:
sail npm install pusher-js
Or
npm install pusher-js
Now that you have all the client-side libraries installed. Let's switch to the resources folder, specifically /resources/js folder, and open the bootstrap.js file.
You'll find a complete section on configuring your front end to communicate with the Laravel Broadcasting system. Listing 3 shows the source code for this section.
Listing 3: Front-end code to connect with back-end broadcasting driver
import Echo from 'laravel-echo';

import Pusher from 'pusher-js';
window.Pusher = Pusher;

window.Echo = new Echo({
   broadcaster: 'pusher',
   key: import.meta.env.VITE_PUSHER_APP_KEY,
   cluster: import.meta.env.VITE_PUSHER_APP_CLUSTER,
   wsHost: import.meta.env.VITE_PUSHER_HOST // ...
   wsPort: import.meta.env.VITE_PUSHER_PORT ?? 80,
   wssPort: import.meta.env.VITE_PUSHER_PORT ?? 443,
   forceTLS: true,
   enabledTransports: ['ws', 'wss'],
});
The code in Listing 3 assigns the Pusher object from the pusher-js library to the global window.Pusher variable. This step is necessary to make Pusher available for the Laravel Echo configuration.
Then it initializes the Laravel Echo instance by creating a new Echo object. It configures the Echo instance with the following options:
- broadcaster: Pusher. Specifies that Pusher will be the broadcasting driver.
- key: import.meta.env.VITE_PUSHER_APP_KEY. The Pusher application key is obtained from the environment variables.
- cluster: import.meta.env.VITE_PUSHER_APP_CLUSTER ?? mt1. The Pusher cluster is obtained from the environment variables. If the cluster is not defined, it returns to the default value of mt1.
- wsHost, wsPort, wssPort, forceTLS: These options define the WebSocket connection details. They are also obtained from the environment variables, providing flexibility in configuring the WebSocket host, ports, and TLS (Secure WebSocket) based on the environment configuration.
- enabledTransports: ws, wss. Only WebSocket and Secure WebSocket transport should be enabled.
This code sets up Laravel Echo with the Pusher driver. It configures the necessary options for establishing a real-time communication channel between the server and the client using Pusher's WebSocket capabilities.
All the environment variables used in Listing 1 are defined by Laravel inside the .env file.
With this code in place, let's test the communication between the application and Pusher. Open the /resources/js/Pages/Welcome.vue component and add the following code snippet to the end of the script setup section:
window.Echo.channel('pusher-status')
.listen('PusherStatusTest', (e) => {
    console.log(e);
});
The code subscribes to a public channel named pusher-status and listens to the event PusherStatusTest.
window.Echo.channel('pusher-status')
This line specifies the public channel you want to subscribe to. In this case, the channel name is 'pusher-status'.
.listen('PusherStatusTest', (e) => {
    console.log(e);
});
This part listens to events on the subscribed channel. Here, PusherStatusTest represents the event name you want to listen for. When an event with the name PusherStatusTest is received on the pusher-status channel, the provided callback function executes.
Open the application in the browser. Then open a new Tinker by running this command:
sail artisan tinker
Or
php artisan tinker
Then, run the following line of code to broadcast the PusherStatusText event:
broadcast(new \App\Events\PusherStatusTest);
Open the browser Dev Tools, and you should see the event payload printed out.
Now that the application is connected to Pusher on both the server and client sides, let's explore the broadcasting channels in Laravel.
Broadcasting Channels
In Laravel, broadcasting channels provide a way to broadcast events and messages to specific channels, allowing real-time communication between server-side code and client-side JavaScript code. Broadcasting channels can be used for various purposes, such as real-time notifications, chat applications, and live updates.
There are three types of broadcasting channels in Laravel: public, private, and presence.
Public Channels
Public channels are accessible to all users and can be used to broadcast events intended for a broad audience. Examples of public channel usage include broadcasting a public chat message or sending real-time updates to all connected clients.
To use a public channel in Laravel, you can define it in the routes/channels.php file. Here's an example of defining a public channel:
use Illuminate\Broadcasting\Channel;
use Illuminate\Support\Facades\Broadcast;
Broadcast::channel(
   'public-channel', function($user) {
        return true;
});
Even though it's not required to register a public channel, having all your channels defined in one route file keeps you reminded of all the channels your application supports.
You can use the broadcast helper function or the event method to broadcast an event to a public channel. Here's an example:
broadcast(new \App\Events\PublicEvent($data));
The above code broadcasts a PublicEvent to the public-channel channel, passing $data as the event payload.
You can listen to public channel events on the client side (JavaScript) using Laravel Echo or Pusher JavaScript SDK. Here's an example:
Echo.channel('public-channel')
    .listen('.public-event', function (event) {
      console.log(event);
    });
In this example, you listen to the public-channel channel for events named .public-event. When an event is received, the callback function is executed.
Notice the use of a dot before the event name. In Laravel, whenever you use the broadcastAs method on the event to define an alias, you need to add the dot. I'll explore the Event class in more depth soon.
Private Channels
Private channels allow you to restrict access to specific authenticated users. This can be useful for broadcasting private messages, notifications, or user-specific updates.
To use a private channel, you need to define it in the routes/channels.php file. Here's an example:
use Illuminate\Broadcasting\Channel;
use Illuminate\Support\Facades\Broadcast;
Broadcast::channel(
   'private-channel.{userId}',
    function ($user, $userId) {
        return $user->id === $userId;
   }
);
In this example, you define a private channel called private-channel.{userId}. The {userId} placeholder allows you to specify the target user's ID. The closure function is used for authorization, where you check if the authenticated user's ID matches the {userId}. This ensures that the currently authenticated user can listen to the channel.
To broadcast an event to a private channel, you can use the toOthers() method, which broadcasts the event to all users except the current user. Here's an example:
broadcast(
   new \App\Events\PrivateEvent($data)
)->toOthers();
The above code broadcasts a PrivateEvent to the private-channel.{userId} channel, excluding the current user.
On the client side (JavaScript), you can listen to private channel events using Laravel Echo or Pusher JavaScript SDK after authenticating the user. Here's an example:
Echo.private('private-channel.' + userId)
    .listen('.private-event', function (event) {
        console.log(event);
    });
In this example, you listen to the private-channel.{userId} channel for events named .private-event. The userId variable should be replaced with the actual user ID.
Presence Channels
Presence channels In Laravel provide a way to broadcast events to specific channels while also maintaining information about the connected users within that channel. This is useful for building real-time chat applications, online collaboration tools, and other scenarios where you need to track the presence of multiple users within a channel.
Presence channels work similarly to private channels but include additional information about the users in the channel. A unique user ID identifies each user within a presence channel.
To use presence channels in Laravel, you'll need a broadcasting driver that supports presence channels, such as Pusher. Here's an example of how to set up and use presence channels in Laravel.
Define the Presence Channel: In your routes/channels.php file, you can define a presence channel similarly to a private channel. Here's an example:
use Illuminate\Support\Facades\Broadcast;
Broadcast::channel(
   'presence-channel.{roomId}',
   function ($user, $roomId) {
      return [
          'id' => $user->id,
          'name' => $user->name
      ];
   }
);
This example defines a presence channel called presence-channel.{roomId}. The {roomId} placeholder allows you to specify the room or group identifier. The closure function is used for authorization, where you can determine if the user can join the channel. Additionally, you can return an array of user information to share with other users in the channel.
Join a Presence Channel: You can use the join method provided by Laravel Echo or the Pusher JavaScript SDK to join a presence channel. Listing 4 shows an example.
Listing 4: Subscribe to a presence channel
Echo.join(`presence-channel.${roomId}`)
    .here(function (users) {
        console.log(users);
    })
    .joining(function (user) {
        console.log(user);
    })
    .leaving(function (user) {
        console.log(user);
    });
The code in Listing 4 is self-explanatory. Every event listener has a specific role in handling users joining or leaving.
Broadcasting to a Presence Channel: You can use the broadcast helper function or the event method to broadcast an event to a presence channel, like private channels. Here's an example:
broadcast(
    new \App\Events\PresenceEvent($data)
)->toOthers();
This code broadcasts a PresenceEvent to the presence-channel.{roomId} channel, excluding the current user.
A common naming convention for naming broadcasting channels can be like this:
{public|private|presence}.EventName.{params?}
- The first part can be public, private, or presence.
- The second is the event name.
- The third and last part can be any parameter. This is optional.
That was a brief introduction to broadcasting channels in Laravel. Now, let's move on and learn more about the broadcasting event.
User Authentication for Private and Presence Channels
When using private or presence channels, Laravel authenticates the user and runs the callback you have defined inside the /routes/channels.php file before allowing the user to listen to events on the WebSocket.
The process of user authentication goes as follows:
- When a new client connects, Laravel attempts to authenticate the request. A WebSocket connection is established between the client and the back-end if the user is authenticated.
- To subscribe to a private or presence channel, the client sends an HTTP request to the Laravel server, specifically to the default endpoint
/broadcasting/auth. - Upon receiving the HTTP request, Laravel invokes the
callbackfunction specified in thechannel.phpfile. If thecallbackfunction returnstrue, the server responds successfully to the client. The response includes the necessary metadata for the client to establish a WebSocket connection with the server in a subsequent request. - On the other hand, if the
callbackfunction defined in thechannel.phpfile returns afalseresult, the server responds with an error. Consequently, the client cannot establish a WebSocket connection with the server.
This initial HTTP request and response is what is called a handshake.
In the context of WebSockets, handshaking refers to the initial exchange of information between a client and a server to establish a WebSocket connection.
Broadcasting Event
In Laravel, a broadcast event is a specific type designed to be broadcast in real-time to connected clients using Laravel's broadcasting system. It allows server-side code to communicate with client-side JavaScript code and enables real-time updates, notifications, and interactivity in web applications.
You create a broadcast event by using the same command you use in Laravel to create any other event.
sail make:event SiteActivity
Or
php artisan make:event SiteActivity
To make this event a broadcasting event, implement the ShouldBroadcast interface. This interface forces your event to define a broadcastOn method to specify on which channel (private, private, or presence) to broadcast the event.
The broadcastOn Method
The broadcastOn method specifies the channels or broadcasting drivers on which the event should be broadcast. The channels determine where the event will be broadcast to, and the clients who are listening on those channels will receive the broadcast event.
Broadcasting on a public channel:
public function broadcastOn()
{
    return new Channel(`public-channel');
}
Broadcasting on a private channel:
public function broadcastOn()
{
    return new PrivateChannel('private-channel');
}
Broadcasting on a presence channel:
public function broadcastOn()
{
    return new PresenceChannel('presence-channel');
}
In addition to the broadcastOn method, you can define other methods.
The broadcastAs Method
In Laravel, the broadcastAs method is used to specify a custom name for a broadcast event when it's broadcast. It allows you to override the default event name that would be used based on the event class name.
By default, Laravel uses the fully qualified class name of the event to determine the event name for broadcasting. For example, if you have an event class named App\Events\PusherStatusTest, the default event name for broadcasting is App\Events\ExampleEvent.
In some cases, you may want to provide a more meaningful or specific name for the event when it's broadcast. This is where the broadcastAs method comes in. You can specify a custom name for the broadcasted event by calling this method within your event class.
Here's an example using broadcastAs method in a Laravel event class:
public function broadcastAs()
{
    return 'site-activity-monitor';
}
By specifying a custom event name, you can have more control over how the event is identified and handled on the client side. It allows you to define a more descriptive or meaningful name that's easier to work with when listening for the event in JavaScript.
It's worth mentioning that when using a custom event name, you should prefix this custom name with a dot when listening to this event on the client side.
Echo.channel('site-activity')
   .listen('.site-activity-name', (e) => {
       console.log(e);
    });
The broadcastWith Method
In Laravel broadcasting, the broadcastWith method is used to include additional data or payload with a broadcast event. It allows you to attach extra information to the event payload sent to the client-side listeners.
Here's an example of using the broadcastWith method in a Laravel event class:
public function broadcastWith()
{
   return [
       'foo' => 'bar',
   ];
}
The returned array from broadcastWith overrides any public properties you define on the event class.
The broadcastWith method overrides any public property defined on the event class. If you want to return both, make sure to merge them all together.
The broadcastQueue Property
In Laravel broadcasting, the broadcastQueue property is used to specify the queue's name on which the broadcasting job should be placed. It allows you to control the queueing behavior for broadcasting events, enabling you to prioritize and manage the execution of the broadcasting jobs.
By default, Laravel executes broadcasting jobs synchronously, meaning the event is broadcast immediately, and the broadcasting process blocks until the event is sent to the broadcasting service and received by the clients. For high-traffic applications or broadcasting events requiring additional processing time, it can be beneficial to queue the broadcasting jobs for asynchronous execution.
Here's an example of using the broadcastQueue property in a Laravel broadcast event class:
class ExampleEvent implements ShouldBroadcast
{
    public $broadcastQueue = 'broadcastable';
    // ...
}
In this example, the ExampleEvent class includes a $broadcastQueue property set to 'broadcastable'. By specifying the queue name, such as 'broadcastable', Laravel enqueues the broadcasting job for this event on the specified queue.
The broadcastVia Method
In Laravel broadcasting, the broadcastVia method is used to specify the broadcasting driver through which a broadcast event should be transmitted. It allows you to override the default broadcasting driver defined in your Laravel application's configuration. In addition, you can use this method not only to override the default broadcasting driver but also in case you have multiple broadcasting drivers configured and you want to use one of them for this specific event.
By default, Laravel uses the broadcasting driver specified in the config/broadcasting.php file for broadcasting events. The broadcastVia method allows changing the broadcasting driver for a specific broadcast event. Using the broadcastVia method, you should ensure that the event class uses the InteractsWithBroadcasting trait. Listing 5 shows the source code for this event.
Listing 5: Event using InteractsWithBroadcasting interface
<?php

namespace App\Events;

use Illuminate\Broadcasting\Channel;
use Illuminate\Broadcasting\InteractsWithBroadcasting;
use Illuminate\Broadcasting\InteractsWithSockets;
use Illuminate\Broadcasting\PresenceChannel;
use Illuminate\Broadcasting\PrivateChannel;
use Illuminate\Contracts\Broadcasting\ShouldBroadcast;
use Illuminate\Queue\SerializesModels;

class PusherStatusTest implements ShouldBroadcast
{
    use InteractsWithBroadcasting;

    public function __construct()
    {
        $this->broadcastVia('pusher');
    }
}
Suppose your application interacts with multiple broadcast connections, and you want to broadcast an event using a broadcaster other than your default. In that case, you may specify which connection to push an event to, using the via method:
use App\Events\PusherStatusTest;

broadcast(
    new PusherStatusTest
)->via('pusher');
The PendingBroadcast class returned by the broadcast method defines the via method.
The broadcastWhen Method
In Laravel broadcasting, the broadcastWhen method determines whether a broadcast event should be broadcast conditionally. It allows you to specify a condition or Boolean expression determining whether the event should be broadcast to the subscribed clients.
The broadcastWhen method is defined within a broadcast event class that implements the ShouldBroadcast interface. By using this method, you can dynamically control the broadcasting behavior based on the result of a condition.
Here's an example of using the broadcastWhen method in a Laravel event class:
class MyEvent implements ShouldBroadcast
{
    public function broadcastWhen()
    {
        return $this->data['value'] > 10;
    }
}
In this example, the MyEvent class implements the ShouldBroadcast interface, indicating that it should be broadcast. The broadcastWhen method is defined and checks the condition $this->data['value'] > 10. If the condition evaluates to true, the event will be broadcast. The event won't be broadcast if the condition is false.
Broadcasting a Notification
In addition to broadcasting events, Laravel provides a powerful feature called notifications, which allows you to broadcast real-time notifications to multiple clients using the same event broadcasting system. Notifications in Laravel are multi-use, including sending a notification via email, SMS, Slack message, and many other options.
To demonstrate broadcasting a notification rather than an event, follow the steps below.
Generating a Notification: Run this command to create a new notification:
php artisan make:notification \BroadcastingNotification
This creates a new notification class in the app/Notifications directory.
Configuring the Notification: Open the newly created notification class (app/Notifications/BroadcastingNotification.php). Make this notification class implement the ShouldBroadcast interface.
Modify the via() method to specify the broadcast channel(s) you want to use.
public function via($notifiable)
{
    return ['broadcast'];
}
You can also define an optional toBroadcast method to specify the broadcasting event payload.
Let's examine an example of the toBroadcast method, which allows you to define how a notification should be broadcast if it supports broadcasting. When a notification class includes a toBroadcast method, it receives a $notifiable entity and should return a BroadcastMessage instance. However, if the toBroadcast method isn't present, the toArray method is used instead to gather the data that needs to be broadcast. The resulting data is then encoded as JSON and sent to your JavaScript-powered front end.
public function toBroadcast(object $notifiable)
{
   return new BroadcastMessage([
       'invoice_id' => $this->invoice->id,
       'amount' => $this->invoice->amount,
   ]);
}
Aside from the specific data you provide, broadcast notifications include a Type field that contains the complete class name of the notification. To customize the notification type, you can define a broadcastType method within the notification class.
public function broadcastType()
{
   return 'broadcast.notification';
}
Listing 6 shows the entire notification class source code.
Listing 6: BroadcastingNotification class
<?php

namespace App\Notifications;

use Illuminate\Bus\Queueable;
use Illuminate\Notifications\Notification;
use Illuminate\Contracts\Broadcasting\ShouldBroadcast;
use Illuminate\Notifications\Messages\BroadcastMessage;

class BroadcastingNotification extends Notification implements ShouldBroadcast
{
    use Queueable;

    public function __construct(
        public string $message
    ) {}

    public function via(object $notifiable)
    {
        return ['broadcast'];
    }

    public function toBroadcast(object $notifiable)
    {
        return new BroadcastMessage([
            'message' => $this->message
        ]);
    }

    public function broadcastType()
    {
        return 'broadcast.notification';
    }
}
To personalize the channel on which an entity's broadcast notifications are transmitted, you can define a receivesBroadcastNotificationsOn method within the respective notifiable entity.
Listing 7 shows an example of customizing the channel name.
Listing 7: Customizing the broadcasting notification channel name
<?php

namespace App\Models;

use Illuminate\Broadcasting\PrivateChannel;
use Illuminate\Foundation\Auth\User as Authenticatable;
use Illuminate\Notifications\Notifiable;

class User extends Authenticatable
{
   use Notifiable;

   public function receivesBroadcastNotificationsOn()
   {
      return 'users.'.$this->id;
   }
}
Firing the Notification: To fire a notification, you have two options:
- Use the
$user->notify()method. For this option to work, remember that you must make the User model use theNotifiabletrait. Listing 8 shows a complete example of using theNotifiabletrait.
Listing 8: Using Notifiable trait to broadcast a notification
<?php

namespace App\Models;

use Illuminate\Foundation\Auth\User as Authenticatable;
use Illuminate\Notifications\Notifiable;

class User extends Authenticatable
{
    use Notifiable;
}

$user->notify(new BroadcastingNotification($data));
- Use the
Notificationfacadesendmethod. In this case, you don't need to use theNotifiabletrait. You can just send out a notification using this code statement:
Notification::send(
   $users, new BroadcastingNotification($data)
);
That's all you need to know about firing a broadcasting notification. Let's review how to handle a broadcasting notification on the front end together.
Handling a Broadcasting Notification: In the same way, you handle a broadcasting event on the front end. You handle a broadcasting notification.
Place this code snippet inside the /resources/js/Pages/Dashboard.vue file.
Echo.private('App.Models.User.' + userId)
   .notification((notification) => {
        console.log(notification);
   });
Open the application in the browser.
Then open a new Tinker by running this command:
sail artisan tinker
Or
php artisan tinker
Then, run the following bit of code to broadcast the BroadcastingNotification event:
use App\Notifications\BroadcastingNotification;
$user = User::find(1);
$user->notify(
   new \BroadcastingNotification('Hello World!')
);
Look at the browser Dev Tools, and you'll see the notification JSON printed on the console:
{
    "Id": "2eda1b33-fb8f-4de5-aea5-31a6a4a2b180",
    "message": "Hello World!",
    "Type": "broadcast.notification"
}
Remember one thing: Laravel constantly broadcasts notifications on private channels. That's why you must place the code that listens to the broadcasting notification on a page where the user is already authenticated to the application.
Laravel constantly broadcasts notifications on private channels.
Conclusion
In conclusion, real-time communication in Laravel opens exciting possibilities for creating dynamic and interactive web applications. In this article, you delved into the power of WebSockets and explored how to implement and use them effectively in Laravel. I covered the basics of WebSockets, demonstrated their use with Laravel Echo and Laravel Broadcasting, and provided practical examples to showcase their capabilities.
Laravel developers can leverage the full range of real-time communication tools by expanding our WebSockets and server-sent events knowledge. These techniques enable the creation of highly responsive and interactive applications that enhance the user experience and keep users engaged.
Together, WebSockets and server-sent events empower Laravel developers to build modern, cutting-edge applications that meet the demands of today's connected world.