In my previous article (May/June 2023 CODE Magazine), I introduced authentication in Laravel. Laravel uses guards to determine an authenticated user by specifying which authentication provider should be used for authentication. Guards are defined in the config/auth.php file and can be customized to fit the needs of your application. Several types of guards are available in Laravel, including session, token, and stateless guards.
In the previous article, I covered authenticating users with the Session Guard in detail. In this article, I'll cover Token Guard and explore how to authenticate a user in Laravel using tokens only.
Token authentication in Laravel is typically used when building stateless APIs. The client application (such as a mobile app or a JavaScript application) needs to authenticate with the server on every request without storing any session information on the server.
Token authentication works by issuing a token to the client upon successful authentication, which is then used to authenticate subsequent requests. The client sends this token in the request headers, and the server uses it to authenticate the user and authorize access to the requested resource.
In Laravel, Sanctum is the token authentication implementation used to authenticate API requests through the auth:sanctum middleware, which protects the routes under the routes/api.php file.
There are other ways to implement Token authentication in Laravel other than Sanctum. Still, being a package developed and maintained by the Laravel team, it's considered the optimal implementation for Token authentication in the Laravel application.
What's Token Authentication?
Token authentication is a method in which a token is exchanged between the client and server to establish and maintain authentication status. In this method, a token is issued to a user after successful authentication. It's then used for subsequent authentication attempts instead of sending the user's credentials, such as username and password, with each request.
The token is typically a string of characters generated by the server. It contains the user's identity and other relevant information that allows the server to validate the authenticity of the request. The token is usually included in the HTTP Header of each request sent by the client, and the server can use it to verify that the request is coming from an authenticated user.
Token authentication is helpful for several reasons:
- It improves security by reducing the risk of credentials being intercepted or stolen because the user's credentials are only exchanged once, during initial authentication.
- It improves performance by reducing the amount of data that needs to be sent with each request.
- It simplifies the implementation of authentication mechanisms in complex systems and enables easy integration with other systems and applications.
- It can be used in distributed systems, where authentication needs to be performed across multiple servers without requiring the servers to share authentication data.
How Laravel Implements Token Authentication?
Laravel offers two packages for Token authentication: Laravel Passport and Laravel Sanctum.
- Laravel Passport: Passport is a full-featured OAuth2 server implementation that provides a complete solution for API authentication. It allows clients to authenticate with your API using various OAuth2 flows, including password grant, authorization code grant, and client credentials grant. Passport requires more configuration and set up than Sanctum, but it offers more advanced features for OAuth2 authentication.
- Laravel Sanctum: Sanctum is a lightweight package that provides a simple way to authenticate API requests using tokens. It's designed for single-page applications, mobile applications, and APIs that need a straightforward and easy-to-use authentication system. Sanctum uses Token authentication, and it does not support OAuth2 authentication flows.
Both packages provide a secure and reliable way to authenticate API requests, but they differ in complexity and the features they offer. Choose the package that best fits the specific requirements of your application.
Before you begin working on your application, consider whether Laravel Passport or Laravel Sanctum would be more suitable for your needs. If your application must support OAuth2, then Laravel Passport is the appropriate choice.
On the other hand, if you're looking to authenticate a single-page application, or mobile application, or generate API tokens, then Laravel Sanctum is the recommended choice. Although it doesn't support OAuth2, it offers a more straightforward API authentication development experience.
Laravel Passport
This package uses OAuth2, an industry-standard protocol for authentication and authorization, to generate and validate access tokens.
When a user logs in, Passport generates an access token and a refresh token. The access token is a JSON Web Token (JWT) containing the user's ID, the token's expiration time, and any additional data required. The refresh token requests a new access token when the current access token expires.
To generate an access token, Laravel uses a combination of the user's ID, a secret key, and the current time to develop a unique signature. This signature is then encoded as a JWT and returned to the client.
When the client makes a subsequent request, it includes the access token in the Authorization header of the HTTP request. Laravel's middleware verifies the validity of the token by checking its signature against the secret key and expiration time. If the token is valid, the request is allowed to proceed.
If the token is invalid or has expired, Laravel returns a 401 Unauthorized response. If the access token has passed, but the refresh token is still valid, the client can use this to obtain a new access token without having to log in again.
Overall, Laravel Passport is designed to be secure, efficient, and easy to use. By leveraging industry-standard protocols like OAuth2 and JWT, Laravel provides a robust and reliable authentication mechanism that can be easily integrated into any Laravel application.
Laravel Sanctum
Laravel Sanctum is a lightweight authentication system for SPAs (single-page applications), mobile applications, and Token authentication APIs.
Laravel Sanctum helps solve two different problems: API Tokens and SPA authentication.
API Tokens
Sanctum provides a straightforward way to create API tokens for your users. You can integrate Sanctum into your application's Account Settings page, where users can generate and manage their API tokens. These tokens usually have a long lifespan but can be manually revoked by the user. Laravel Sanctum stores user API tokens in a single database table and verifies incoming HTTP requests using the Authorization header that contains a valid API token.
Token authentication is a method of authenticating users in a mobile application:
- The user submits their login credentials to a Login endpoint within the Laravel application.
- A token is generated and returned to the mobile application after successfully validating the credentials.
- The token is stored locally and sent with every subsequent request to the Laravel API within the request header.
- Laravel API validates the token in the request header and performs authentication of the request accordingly.
SPA Authentication
Laravel Sanctum doesn't use tokens for Single Page Applications (SPAs) but instead relies on session cookies for authentication. Here's how Sanctum works for SPAs:
- When a user logs in or signs up, Sanctum generates a unique, encrypted session cookie that's returned to the user's client-side SPA application.
- The session cookie is stored in the browser's cookie storage and sent with each subsequent request to the Laravel application.
- The Laravel Sanctum middleware validates the session cookie and checks whether it's associated with a valid user account.
- If the session cookie is valid, the Laravel application processes the request and returns the response.
- If the session cookie is invalid or has expired, the Laravel application returns a 401 Unauthorized response, indicating that the user needs to log in again.
Laravel Sanctum also provides mechanisms for revoking session cookies. If a user logs out or their account is deleted, any active session cookies associated with their performance can be invalidated. This ensures that unauthorized users cannot use an account after deactivating it.
Overall, Laravel Sanctum is a powerful and flexible package for Token authentication that can significantly simplify the building of secure SPA and mobile applications in Laravel.
Applying Token Authentication in Laravel
In this section, let's focus on how to use Laravel Sanctum to authenticate users. The examples I give include both SPAs and mobile applications.
Create a New Laravel Application
Start by creating a new Laravel application. There are several methods for creating a new Laravel app. I chose the Docker-based one using the Laravel Sail package. You can read more about Laravel installation by following this URL: https://laravel.com/docs/10.x/installation.
Choose the method that best suits you. Before you start, make sure you have Docker running on your computer.
I'm using a MacBook Pro. I start by running this command:
curl -s \
"https://laravel.build/token-auth-laravel"\
| bash
This creates a new Laravel application on your computer under the directory named token-auth-laravel.
After the installer finishes, run the following commands:
- Build up the Docker container.
./vendor/bin/sail up
- Install the NPM packages.
./vendor/bin/sail npm install
- Serve the application.
./vendor/bin/sail run dev
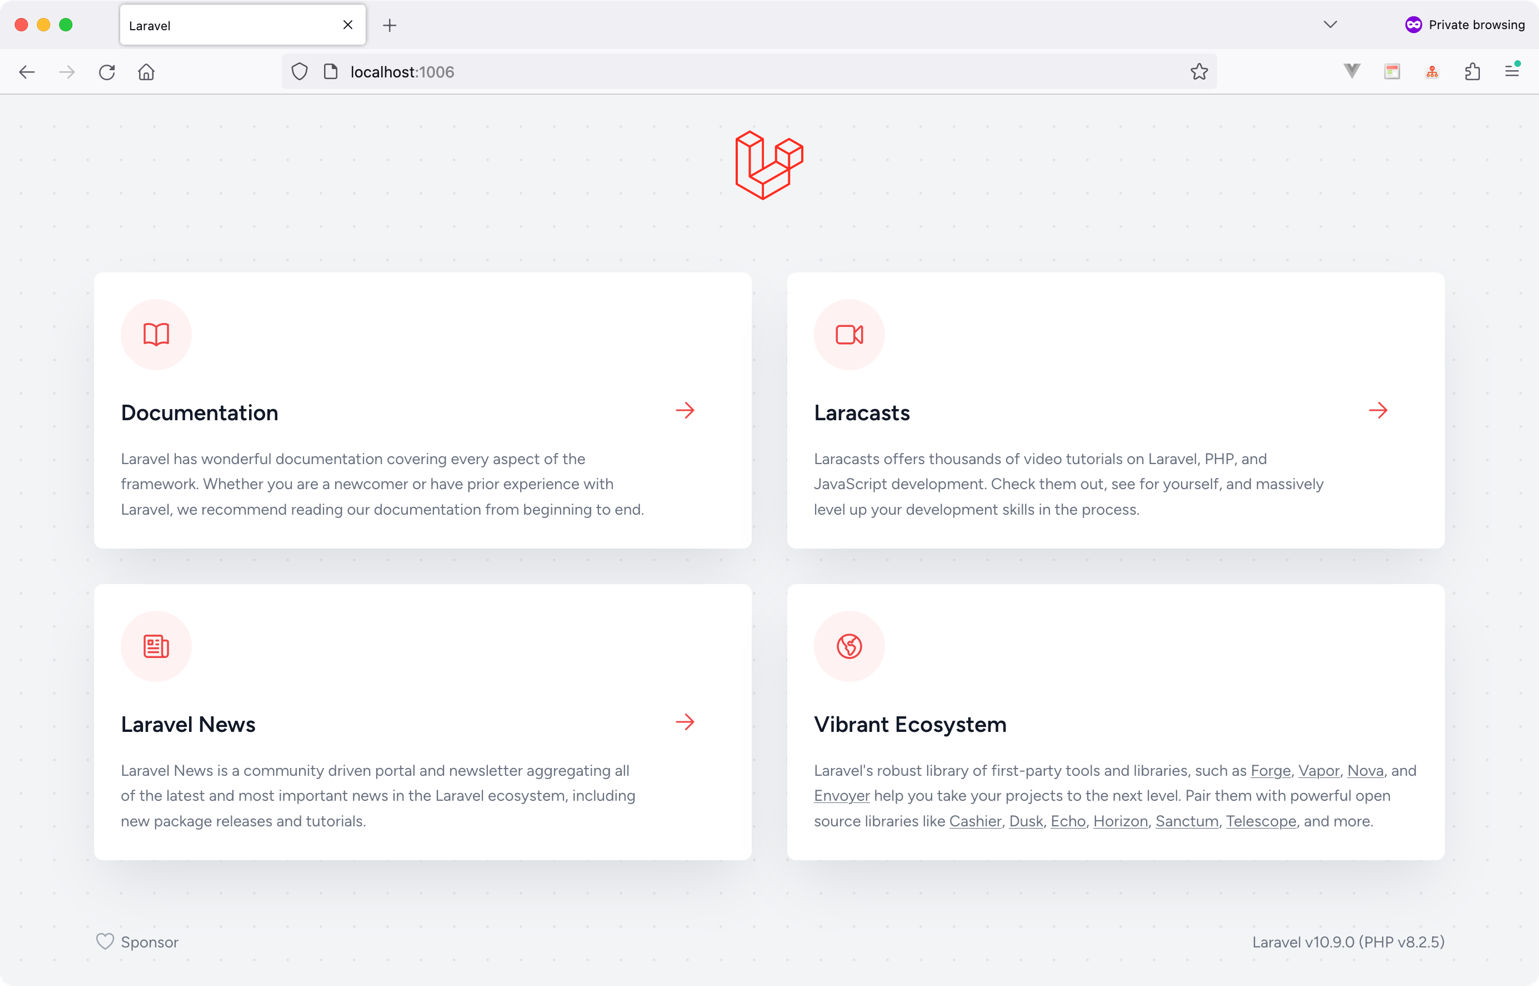
The application is now accessible at http://localhost. Open the URL in the browser, and you'll see the same view as in Figure 1.
Next, let's install the Laravel Breeze starter kit. The Laravel team provides this starter kit for scaffolding Laravel authentication and Profile management. This is my ultimate choice when starting a new Laravel project. Trust me: It saves you a lot of time! You can read more about Laravel Breeze here: https://laravel.com/docs/10.x/starter-kits#laravel-breeze.
Laravel Breeze comes in four flavors:
- Breeze & Blade
- Breeze & React
- Breeze & Vue
- Breeze & Next.js/API
I'll use Breeze & Next.js/API for this article.
Run the following commands to install Laravel Breeze:
./vendor/bin/sail \
composer require \
laravel/breeze --dev

./vendor/bin/sail \
artisan breeze:install api

./vendor/bin/sail \
artisan migrate
The Laravel Breeze for API added the basic configuration settings for Laravel Sanctum and all necessary HTTP Controllers to log in, log out, register users, and more. Laravel Breeze for API removes your application's front-end-related files and folders. This makes it suitable for projects that only serve APIs. As a result, the package.json file and other front-end files are removed.
If you wish to serve your API project using Laravel Breeze for API, you can do so by running the following command:
./vendor/bin/sail \
artisan serve
This command starts the Laravel Sail development environment and serves your API project.
Login Mobile Application Users
The routes/api.php file governs the communication between the Laravel API application and a mobile application. Let's explore the content of this file.
<?php

Route::middleware(['auth:sanctum'])
  ->get('/user', function (Request $request) {
      return $request->user();
});
The code snippet defines a GET route at the path /api/user inside the routes/api.php file. This route is protected by the auth::sanctum middleware, meaning the user must be authenticated using Laravel Sanctum before accessing this route.
The code inside the closure function of the route definition retrieves the currently authenticated user using the $request->user() method. This method returns an instance of the authenticated user model if the user is authenticated or null if the user is not.
When a user makes a GET request to the /api/user endpoint with a valid authentication token, the closure function returns a JSON response containing the user object, which includes details such as the user's name, email address, and other information stored in the user model.
If the user is not authenticated or the authentication token is invalid, the auth:sanctum middleware automatically returns a 401 Unauthorized response, denying the user access.
When communicating with Laravel API endpoints, both the request and response payloads contain JSON data. Hence, it's essential to continually include two request header keys in every request to the API:
- Accept
- Content-Type
The Content-Type header of the request should be set to application/json because you're sending JSON data in the request body. This header tells the server that the request body is in JSON format and should be parsed as such.
The Accept header, on the other hand, is used to indicate the desired response format. In this case, you're returning JSON data, so the Accept header can be set to application/json to tell the server that you expect a JSON response.
Let's add a new post endpoint to log in users coming from a mobile application. To do so, add the following route to the routes/api.php file:
Route::post('/login', LoginController::class);
Next, let's create the LoginController class as an invokable controller using this command:
./vendor/bin/sail \
artisan make:controller \
API/Auth/LoginController --invokable
I'm placing the new controller inside the app/Http/Controllers/API/Auth folder.
Open the LoginController class and paste the source code shown in Listing 1 inside the __invoke() controller method.
Listing 1: Authenticate Mobile application users
public function __invoke(Request $request)
{
    $request->validate([
        'email' => 'required|email',
        'password' => 'required',
        'device_name' => 'required',
    ]);

    $user = User::query()
      ->where('email', $request->email)
      ->first();

    if (
         !$user ||
         !Hash::check(
                 $request->password,
                 $user->password
        )
    ) {
          throw ValidationException::withMessages([
               'email' => [
                'The provided credentials are incorrect.'
               ],
        ]);
    }

    return $user
             ->createToken($request->device_name)
             ->plainTextToken;
}
Let's explain the code in Listing 1 step by step.
- The controller method accepts an HTTP request via the
$requestparameter. - The
$requestparameter is then validated to ensure that it contains the required fields for authentication. These fields are the user's email, password, and the device name they are using to log in. - Next, the method queries the User model to find a user with the email address provided in the request.
- If the user is found, their password is checked to ensure that it matches the password provided in the request. If the password does not match, a validation exception is thrown with an error message stating that the credentials are incorrect.
- If the user's email and password are validated successfully, the method generates a new token for the user using the
createToken()method provided by Sanctum. This token is associated with the device name provided in the request. - Finally, the method returns the plain text value of the token to the client. The client can use this token for subsequent authenticated requests to the server.
In this case, the result of authenticating a user is that a new token is generated and sent to the user. This token should then be added to the header of every future request to the application.
Back to the original defined route in routes/api.php file:
<?php

Route::middleware(['auth:sanctum'])
    ->get('/user', function (Request $request) {
           return $request->user();
});
Assuming that the user is authenticated and owns a token, an incoming request to the URL /api/user will be authenticated using the Sanctum Guard represented by the middleware auth::sanctum.
This middleware first checks if a session cookie exists in the incoming request (this is the default for SPA applications). Otherwise, it tries to locate a token in the request header. For mobile users, that's the default behavior. Laravel Sanctum validates the token and accordingly allows or forbids access to the /api/user route.
Now, let's add a few tests to ensure this code runs.
Create a new test using this command:
./vendor/bin/sail \
artisan make:test \
API/Auth/LoginControllerTest
Paste the source code in Listing 2 inside the LoginControllerTest file.
Listing 2: LoginController Tests
class LoginControllerTest extends TestCase
{
    use RefreshDatabase;

    /** @test */
    public function login_mobile_user()
   {
      $user = User::factory()->create([
       'email' => 'test@example.com',
       'password' => bcrypt('password'),
      ]);

      $response = $this->post('/api/login', [
          'email' => $user->email,
          'password' => 'password',
          'device_name' => 'Bilal iPhone 12',
      ]);

      $response->assertOk();

      $this->assertNotEmpty(
          $response->getContent()
      );

      $this->assertDatabaseHas('personal_access_tokens',
      [
        'name' => 'Bilal iPhone 12',
        'tokenable_type' => User::class,
        'tokenable_id' => $user->id
      ]);
   }
}
Run this test using this command:
./vender/bin/sail \
test --filter "login_mobile_user"
The test should run and pass. Now let's look at it in some detail and explain exactly what's happening here.
This test verifies that the /api/login endpoint properly authenticates mobile users using Laravel Sanctum. Here's what the test is doing:
- The
use RefreshDatabasestatement ensures that the test database is reset before each test. This ensures that the tests run with a consistent state. - The
$uservariable is created using theUser::factory()->create()method, which makes a new user in the database. The user is given a specified email and password for testing purposes. - The
$responsevariable is set to the result of sending a POST request to the/api/loginendpoint with the user's email, password, and device name provided in the request payload. - The
$response->assertOk()method verifies that the server returns a 200 HTTP status code, indicating that the request was successful. - The
$this->assertNotEmpty($response->getContent())method verifies that the response content is not empty. Remember, the/api/loginendpoint returns the user's token. - The
$this->assertDatabaseHas()method verifies that a personal access token was created for the user in the personal_access_tokens table with the specified device name.
Let's add another test to ensure that the authenticated user can access the default /api/user endpoint.
Paste the testing method shown in Listing 3 at the end of the LoginControllerTest file.
Listing 3: More tests for LoginController
/** @test */
public function access_user_endpoint()
{
   Sanctum::actingAs(User::factory()->create());

   $response = $this->get('/api/user');

   $response->assertOk();
}
Run this test using this command:
./vender/bin/sail \
test --filter "access_user_endpoint"
The test should run and pass. Let's see the result.
This test verifies that a user can access the /api/user endpoint when authenticated using Laravel Sanctum. Here's how:
- The
Sanctum::actingAs()method logs in a user and creates a new token for them. TheUser::factory()->create()method creates a new user in the database and logs them in using Sanctum. - The
$responsevariable is set to the result of sending a GET request to the/api/userendpoint. This endpoint is protected and requires an authenticated user to access it. - The
$response->assertOk()method verifies that the server returns a 200 HTTP status code, indicating that the request was successful.
Register Mobile Application Users
Next, let's add an endpoint to allow mobile application users to register on the application. For that, create a new controller for registration using this command:
./vendor/bin/sail \
artisan make:controller \
API/Auth/RegisterController --invokable
Paste the code in Listing 4 inside the newly created controller.
Listing 4: Register mobile application user
class RegisterController extends Controller
{
    public function __invoke(Request $request)
    {
       request()->validate([
           'name' => ['required'],
           'email' => [
               'required',
               'email',
               'unique:users,email'
           ],
           'password' => [
               'required',
               'min:8',
               'confirmed'
           ],
           'device_name' => ['required']
       ]);

       $user = User::create([
           'name' => request('name'),
           'email' => request('email'),
           'password' => bcrypt(request('password')),
       ]);

       return $user
                ->createToken(request('device_name'))
                ->plainTextToken;
    }
}
The `request()->validate()`` method is used to validate the incoming request data. This ensures the request contains valid data before creating a new user.
The validation rules are defined in an array and include the following:
- name: required, must be present in the request.
- email: required, must be a valid email address, and must be unique in the users' table.
- password: required, must be at least eight characters long, and must match the confirmation password.
- device_name: required, must be present in the request.
A new user is created using the
User::create()method if the validation passes. The user's name, email, and password are obtained from the request data and stored in the users' table.The user's password is encrypted using the
bcrypt()method, which hashes the password and ensures that it cannot be read in plain text.Finally, the user's personal access token is created using the
createToken()method, which generates a new token for the user and associates it with the provided device name. TheplainTextTokenattribute of the token is returned to the client, which can be used to authenticate future requests.
Next, let's add a test to ensure this endpoint works properly.
Create a new test using this command:
./vendor/bin/sail \
artisan make:test \
API/Auth/RegisterControllerTest
Paste the code in Listing 5 inside the RegisterControllerTest file.
Listing 5: Register Controller Tests
class RegisterControllerTest extends TestCase
{
    use RefreshDatabase;

    /** @test */
    public function register_new_user()
   {
        $user = [
            'name' => 'Bilal Haidar',
            'email' => 'test@example.com',
            'password' => 'password',
            'device_name' => 'Bilal iPhone 12',
        ];

        $response = $this->post('/api/register', [
            'name' => $user['name'],
            'email' => $user['email'],
            'password' => $user['password'],
            'password_confirmation' => $user['password'],
            'device_name' => $user['device_name'],
        ]);

        $response->assertSuccessful();

        $this->assertNotEmpty($response->getContent());

        $this->assertDatabaseHas('users',
        [
            'email' => $user['email']
        ]);

        $this->assertDatabaseHas('personal_access_tokens',
        [
            'name' => $user['device_name']
        ]);
   }
}
The register_new_user() test method creates a new user array with the following fields:
- name: the name of the user
- email: the email address of the user
- password: the password of the user
- device_name: the device's name associated with the user's access token
The test then makes a POST request to the /api/register endpoint with the user data in the request body.
The assertSuccessful() method ensures that the response has a status code of 200 or 201, indicating that the user was successfully created.
The assertNotEmpty() method is used to ensure that the response content is not empty.
The assertDatabaseHas() method ensures that the newly created user is stored in the database. The first call checks for the existence of the user's email in the users' table, and the second call checks for the presence of the device name in the personal_access_tokens table.
Logout Mobile Application Users
Let's look at how to implement a logout functionality for your mobile application users. Start by creating a new controller and add a new route to routes/api.php file.
Run this command to create a new LogoutController class.
./vendor/bin/sail \
artisan make:controller \
API/Auth/LogoutController --invokable
Next, add the /api/logout route inside the routes/api.php file. You want only authenticated users to access the logout route. Therefore, refactor the routes/api.php file a little, as shown in Listing 6.
Listing 6: Add logout route to routes/api.php
Route::post('/login', LoginController::class);
Route::post('/register', RegisterController::class);

Route::middleware(['auth:sanctum'])
   ->group(function() {
        Route::get('/user', function (Request $request) {
            return $request->user();
        });
      Route::post('/logout', LogoutController::class);
});
Let's now add the functionality to log out the user. Replace the __invoke() method inside LogoutController class with the following code snippet:
public function __invoke(Request $request)
{
    return request()
        ->user()
        ->currentAccessToken()
        ->delete();
}
The currentAccessToken() method is called on the authenticated user to retrieve the access token associated with their current session. Calling the delete() method on the access token deletes it and effectively logs out the user.
Next, let's add a test to ensure this endpoint works properly.
Create a new test using this command:
./vendor/bin/sail \
artisan make:test \
API/Auth/LogoutControllerTest
Paste the code in Listing 7 inside the LogoutControllerTest file.
Listing 7: LogoutController tests
class LogoutControllerTest extends TestCase
{
    use RefreshDatabase;

    /** @test */
    public function logout_user()
    {
        $user = User::factory()->create([
            'email' => 'test@example.com',
            'password' => bcrypt('password'),
        ]);

        Sanctum::actingAs($user);

        $response = $this->post('/api/logout');

        $response->assertOk();

        $this->assertDatabaseCount('personal_access_tokens', 0);
    }
}
The test in Listing 7 does the following:
- The
Sanctum::actingAs($user)method is called to authenticate the newly created user by generating an access token using Laravel Sanctum'sactingAs()method. This allows the user to make authenticated requests to the API. - The
$this->post('/api/logout')method is used to send a POST request to the/api/logoutroute to logout the authenticated user. - The
assertOk()method is called on the response object to ensure that the response status code is 200 OK, indicating that the logout request was successful. - The
$this->assertDatabaseCount('personal_access_tokens', 0)method is used to ensure that the access token associated with the authenticated user has been deleted from the personal_access_tokens database table.
Configure Laravel Sanctum for SPA Applications
Laravel Sanctum uses Laravel's cookie-based session authentication to authenticate users in your SPA application. The login workflow goes as follows:
- Start by requesting a CSRF cookie from Sanctum, which allows you to make CSRF-protected requests to normal endpoints like
/login. - Then, request the normal Laravel
/loginendpoint. - Laravel issues a cookie holding the user's session.
- Any future requests to the Laravel API now include this cookie, so your user is authenticated for the lifetime of that session.
Configuration settings are needed when trying to authenticate your SPA using Laravel Sanctum. I will detail them in this section step by step so that you can follow along.
First, your SPA and Laravel API must be on the same top-level domain. You cannot have your SPA on domainA.com and the Laravel API on domainB.com. The reason is that Laravel Sanctum sets up an HttpOnly Lax cookie. This cookie is secure and cannot be read or stolen. But most importantly, it cannot be shared across different domains.
The SPA and the Laravel project must be on the same top-level domain when using Laravel Sanctum.
You can read more about HttpOnly and Lax cookies here: https://developer.mozilla.org/en-US/docs/Web/HTTP/Headers/Set-Cookie.
Now, create a Vue3 application to use while setting up and configuring Laravel Sanctum for SPA authentication.
Run the following command to create a new Vue3 project.
npm init vue@latest
Follow the instructions on the screen to create and run your SPA application. Notice the last step. When you run the SPA application, the application URL is: http://127.0.0.1:5173.
Note also, when you run the Laravel API application, it will be running on the default URL and route: http://localhost:8000.
Both applications have the same top-level domain; hence, Laravel Sanctum can be used.
Start by configuring the CORS. What is CORS anyways?
CORS stands for cross-origin resource sharing, a security feature implemented in modern web browsers that allows web applications to make cross-origin requests to APIs or resources hosted on other domains. In simpler terms, CORS is a mechanism that allows a web page to request a different domain than the one that served the web page.
By default, web browsers prevent web pages from making cross-origin requests to resources on different domains to prevent malicious attacks, such as cross-site scripting and cross-site request forgery.
CORS provides a way for web developers to specify which domains are allowed to make cross-origin requests to their resources and which types of requests are allowed (e.g., GET, POST, PUT, DELETE, etc.).
CORS works by adding specific headers to HTTP requests and responses that indicate whether a particular request is allowed. These headers include Access-Control-Allow-Origin, Access-Control-Allow-Headers, Access-Control-Allow-Methods, and Access-Control-Allow-Credentials, among others.
What is an Origin anyway? An Origin is a combination of a scheme (also known as the protocol, for example, HTTP or HTTPS), hostname, and port (if specified).
Therefore, the domains we have so far, http://localhost:5173 and http://locationhost:8000, have two different origins because the ports are different. That's why you should configure CORS at the Laravel API application to allow this communication between two applications hosted on two different origins.
To configure the CORS in a Laravel application, go to the config/cors.php file. Listing 8 shows the content of this file.
Listing 8: CORS.config file
return [
   'paths' => ['*'],

   'allowed_methods' => ['*'],

   'allowed_origins' => [env(
       'FRONTEND_URL', 'http://localhost:3000'
    )],

   'allowed_origins_patterns' => [],

   'allowed_headers' => ['*'],

   'exposed_headers' => [],

   'max_age' => 0,

   'supports_credentials' => true,
];
Let's explain some of the settings in this file.
- The path field specifies which Laravel route paths accept cross-origin requests. The asterisk here means all paths in this application can accept cross-origin requests.
- The allowed_methods field specifies what HTTP methods can be received on a cross-origin request. This can be POST, GET, PUT, etc. The asterisk here means all methods are allowed on cross-origin requests.
- The allowed_origins field specifies what Origins are allowed to send requests to this Laravel API application. In this case, it only allows the Origin specified in the
FRONTEND_URLenvironment variable. In case you don't configure this environment variable, it automatically assumes the SPA is hosted overhttp://location:3000. - The allowed_origins_pattern field allows you to specify a regex (
https://regexr.com) to match the Origins. - The allowed_headers field specifies what HTTP Headers are allowed to send in cross-origin requests. The asterisk here means all HTTP Headers are allowed for cross-origin requests.
- The exposed_headers field specifies what HTTP Headers this Laravel API application would like to share with the SPA JavaScript application.
- The max_age field specifies the amount of time to cache Preflight CORS requests.
Let's explore Preflight requests.
Preflight requests are a mechanism used by the browser to determine whether it's safe to make a cross-origin request to a server. A preflight request is an HTTP OPTIONS request sent to the server before the actual cross-origin request is made.
The preflight request includes headers such as Origin, Access-Control-Request-Method, and Access-Control-Request-Headers, which specify the origin of the request, the HTTP method that will be used in the actual request, and the custom headers that will be sent in the actual request, respectively.
The server must respond to the preflight request with the appropriate CORS headers, including Access-Control-Allow-Origin, Access-Control-Allow-Methods, and Access-Control-Allow-Headers, indicating that the request is allowed and which origins, methods, and headers are allowed.
Once the browser receives the appropriate CORS headers in response to the preflight request, it proceeds with the actual cross-origin request.
Finally, the supports_credentials field specifies whether the Laravel API application wants to share the cookies with the SPA application.
Now open the .env file and update the FRONTEND_URL environment variable to match the URL of the SPA application.
FRONTEND_URL=http://localhost:5173
Make sure you don't add a trailing forward slash. That's very important to remember.
Next, you need to add the SESSION_DOMAINenvironment variable. This variable defines the cookie domain used to identify a session in the Laravel API application. This will determine which domains the cookie is available to in your application.
SESSION_DOMAIN=localhost
Ensure that you don't add a trailing forward slash, a port number, or a scheme (HTTP and HTTPS).
Finally, you need to add one more environment variable, the SANCTUM_STATEFUL_DOMAINS.
SANCTUM_STATEFUL_DOMAINS is an environment variable used in Laravel Sanctum that specifies the domains for which Sanctum's stateful authentication mechanisms will be used.
Stateful authentication in Sanctum involves cookies to authenticate the user. When a user logs in, Sanctum creates a cookie containing a signed JSON Web Token (JWT) that identifies the user. This cookie is sent with every subsequent request to the server, allowing the server to authenticate the user without requiring their credentials with each request.
However, cookies can only be sent to the domain that sent them and not to other domains. This means that if you have a single-page application (SPA) that requests your API from a different domain, the cookies that Sanctum sets for authentication won't be sent with the requests, and the user won't be authenticated.
To enable stateful authentication for a different domain, add the domain to the SANCTUM_STATEFUL_DOMAINS environment variable. This tells Sanctum to also allow cookies to be sent to that domain, so the user can be authenticated across domains.
Add the following line to the application's .env file as follows:
SANCTUM_STATEFUL_DOMAINS=localhost:5173
That's all you need to configure Laravel Sanctum to authenticate SPA users.
Login SPA Users
When you installed Laravel Breeze for APIs, it included all the necessary server-side code to authenticate, log out, register, reset passwords, and many other functions. Navigate to the app/Http/Controllers/Auth folder and study the code.
Locate the routes/web.php file and navigate to the last line in that file:
require __DIR__.'/auth.php';
It requires the auth.php routes file. If you open this file, you will find all the necessary routes to Login, Logout, Register, Reset Password, and many other routes you need for your SPA.
For instance, here is a code snippet to show the endpoint route to allow SPA users to log in to the application:
Route::post('/login', [
    AuthenticatedSessionController::class, 'store'
   ])
   ->middleware('guest')
   ->name('login');
The AuthenticatedSessionController@store method is responsible for authenticating the user. This is the same logic used in any Laravel application, not only in Laravel API applications.
Let's add an HTML Form to the SPA application to allow the user to log in to the Laravel API application.
First, let's install Axios (https://axios-http.com/docs/intro) into the SPA application. Navigate to the SPA application and run the following command:
npm install axios
One nice thing I like about Axios is that it does some things out of the box. For example, it takes the CSRF cookie generated by the Laravel application and sets it as an HTTP Header when sending the requests to the Laravel API application.
Also, I've installed and configured Taliwindcss. To install Tailwindcss, follow this guide: https://v2.tailwindcss.com/docs/guides/vue-3-vite
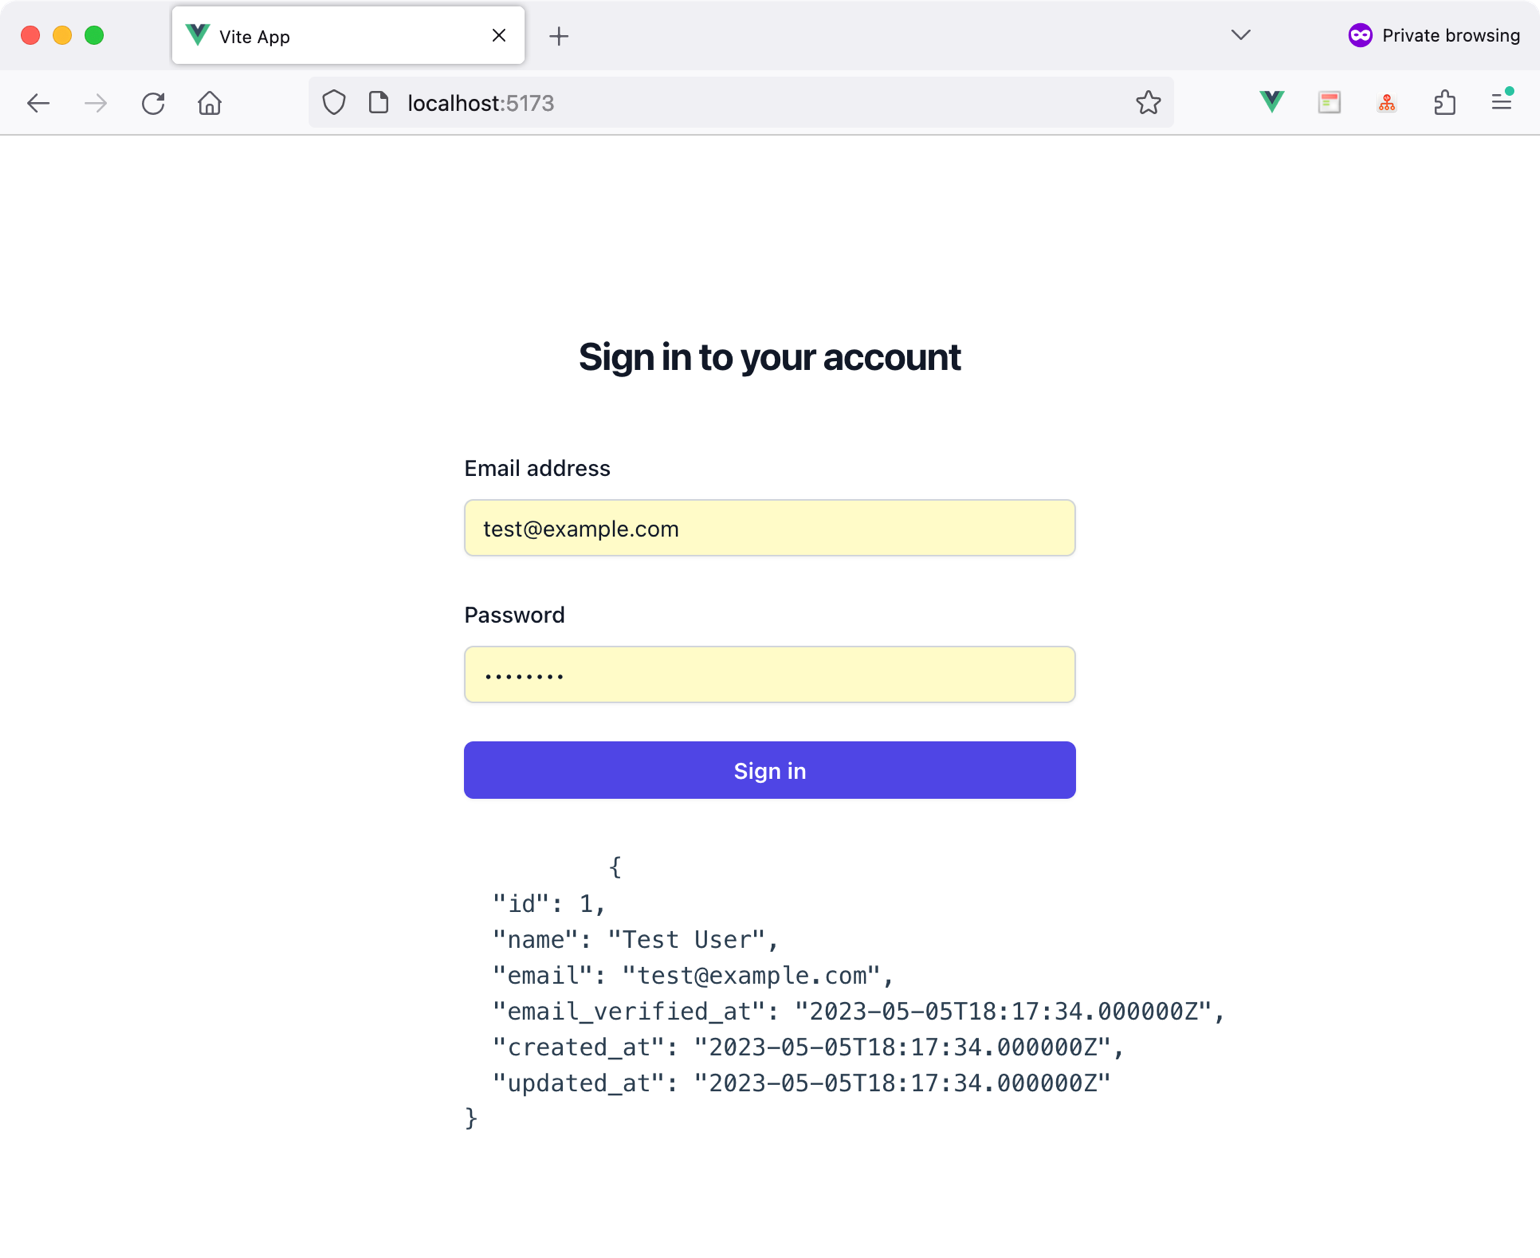
Add a new Login.vue component. Paste the code you see in Listing 9 inside this new component file.
Listing 9: Login.vue component
<script setup>
import axios from 'axios'
import { ref } from 'vue'

axios.defaults.withCredentials = true

const form = ref({
    email: null,
    password: null,
})

const user = ref()

const onLogin = async () => {
    await axios.get('http://localhost:1006/sanctum/csrf-cookie')

    await axios.post('http://localhost:1006/login', {
       'email': form.value.email,
       'password': form.value.password,
    })

    let { data } = await axios.get('http://localhost:1006/api/user')

    user.value = data
}

</script>

<template>
    <div>

    <h2>Sign in to your account</h2>

    <form @submit.prevent="onLogin">

        <label>Email address</label>
        <input v-model="form.email">

        <label>Password</label>
        <input v-model="form.password">

        <button>Sign in</button>

    </form>

    <pre>
        {{ user }}
    </pre>

    </div>
</template>
Let's discover the significant sections of the Login component.
When the user clicks the button, the form submits, and eventually, the user details are retrieved accordingly for a successful login request.
One last step is to import the Login.vue component into the App.vue component to see the Login page in the browser.
Figure 2 shows the result of trying the Login form in the browser.
By doing this, you finish implementing Laravel Sanctum for both SPA and mobile applications.
Conclusion
Laravel offers comprehensive solutions for security, including authentication, authorization, and other related features. You can confidently add a robust security layer to your application with the necessary knowledge. In the next installment of this series on building MVC applications with Laravel, I'll delve into the topic of authorization in Laravel.
Happy Laravelling!